
I’ve hiked the West Rim Trail Zion multiple times, and I’m here to help you plan your trip. This guide covers everything you need from trailhead options to camping spots, navigation tips, and safety advice.
You’ll learn about the trail distance, difficulty, best hiking times, and what to pack. I’ll walk you through the route breakdown and show you how to reach Scout Lookout.
I’ve spent years hiking Zion’s backcountry, so trust me when I say this trail delivers views you won’t forget.
Let’s get you ready for one of Zion’s most rewarding hikes.
West Rim Trail Zion Quick Overview
The West Rim Trail spans about 14 miles one-way with significant elevation changes. Starting from Lava Point takes you downhill into Zion Canyon, while starting from The Grotto means a steep climb up.
Most hikers rate this as moderate to strenuous. Plan for 6-8 hours if going one-way or break it into an overnight trip.
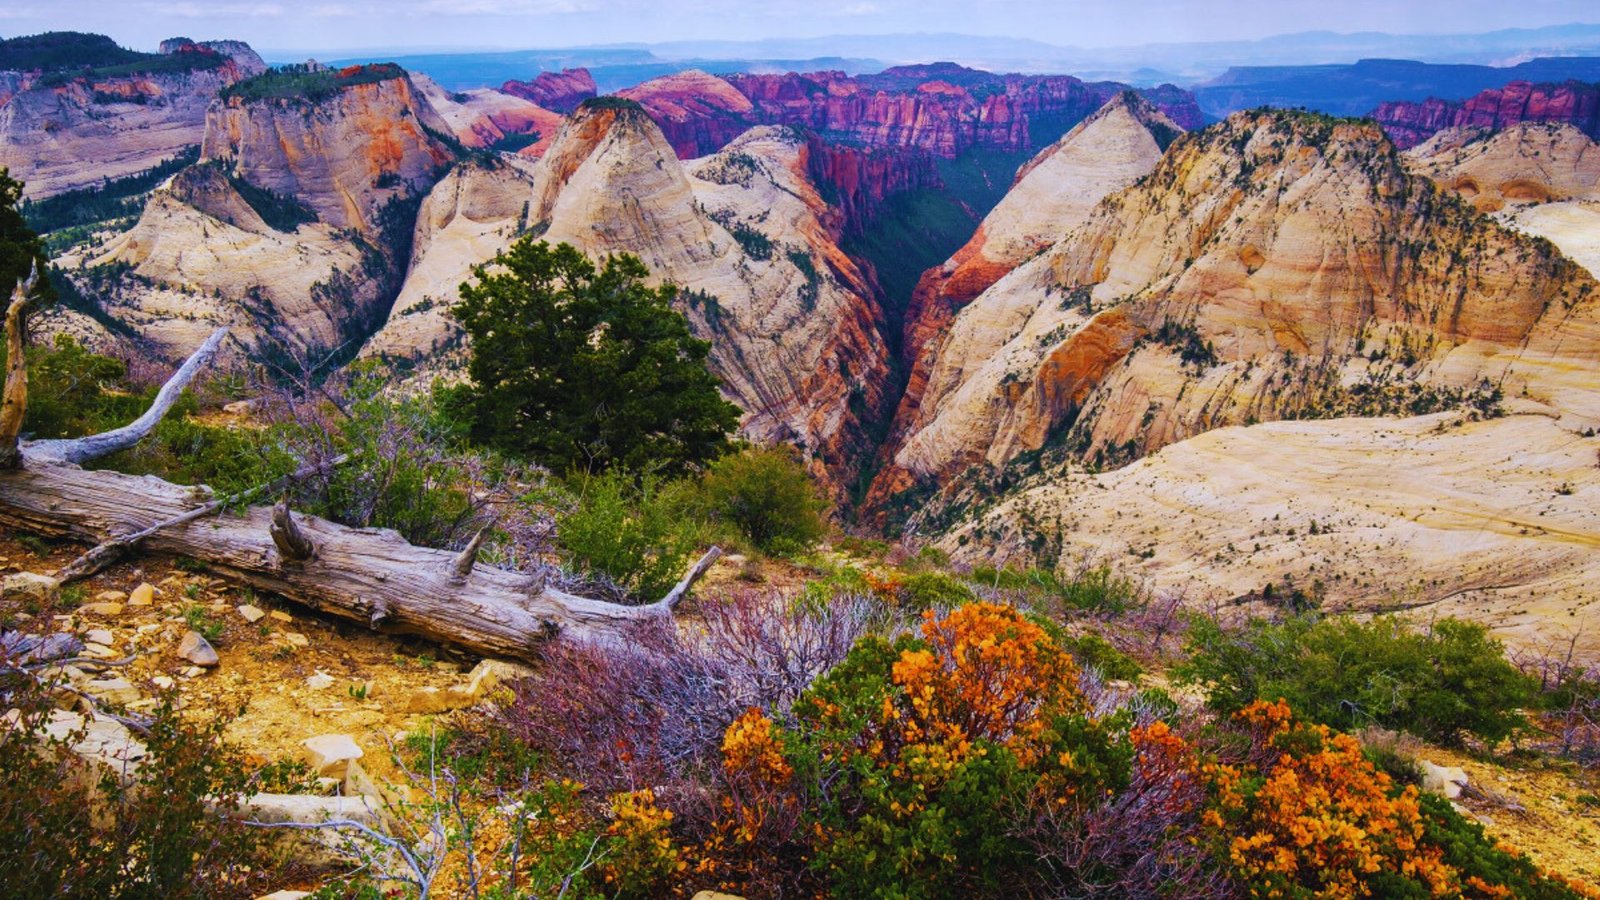
The trail sits in Zion National Park’s backcountry and offers some of the park’s best canyon views. You’ll hike through pine forests, open meadows, and red rock country all in one trip.
The trail is less crowded than popular canyon routes, giving you more solitude. Water sources are limited, so come prepared with enough supplies for your entire hike.
West Rim Trail Zion Map and Navigation
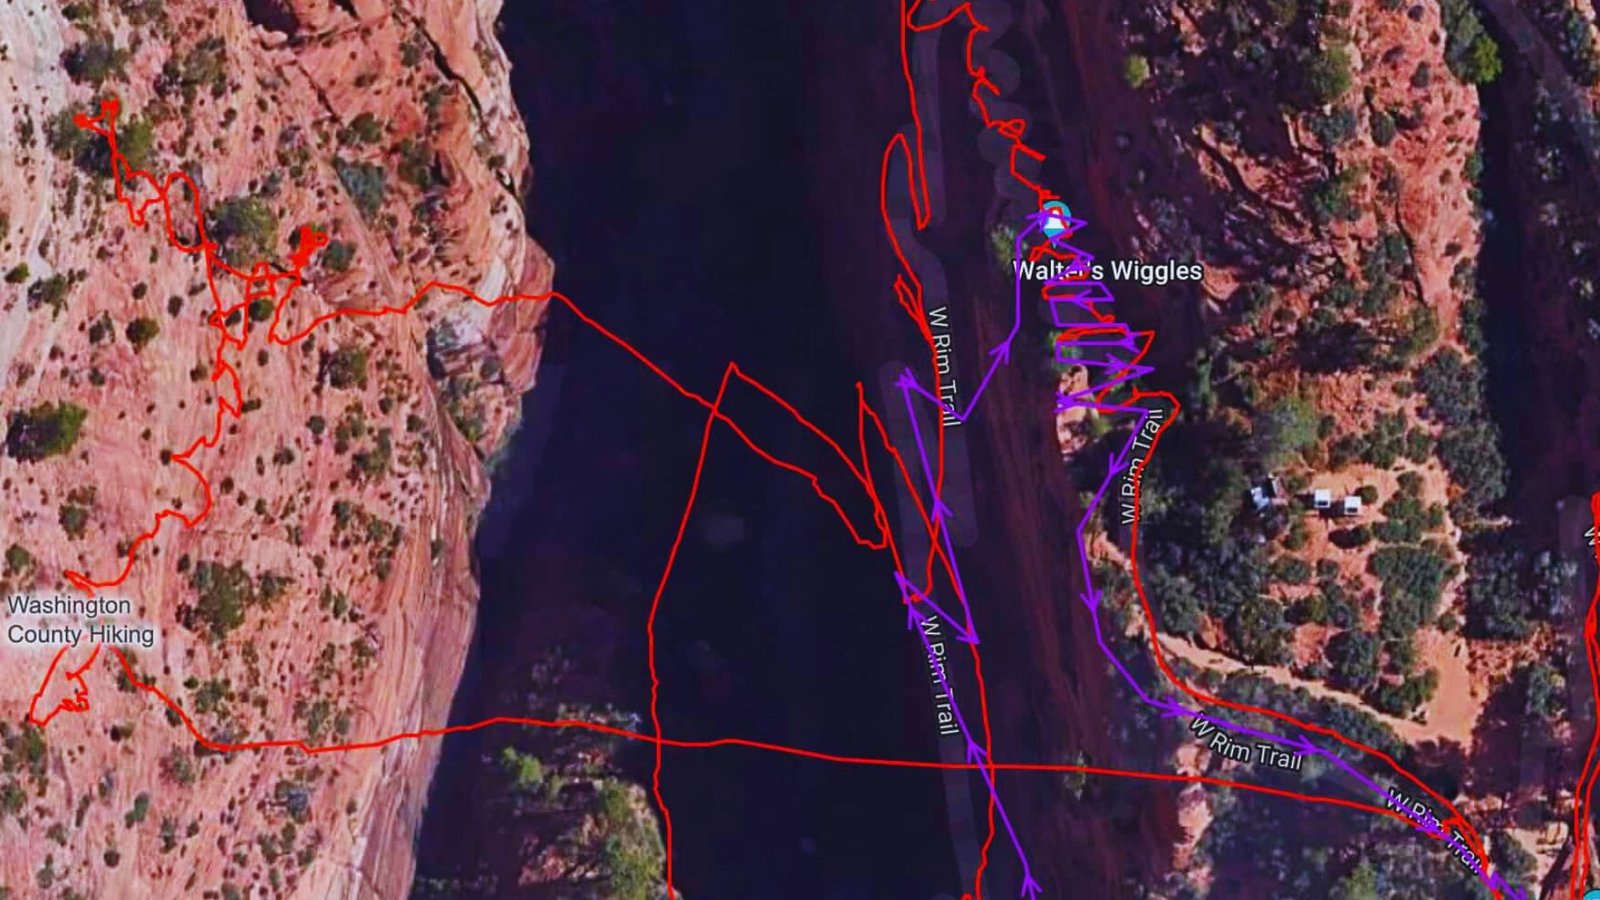
The official Zion National Park map shows the West Rim Trail clearly. You can grab one at the visitor center or download it from the NPS website. The NPS app also includes offline maps that work without cell service. Print a physical copy as your backup since technology can fail.
The trail is well-marked with cairns and signs at major junctions. First-time hikers should pay attention at Potato Hollow and the descent into Zion Canyon. These sections have multiple side trails that can cause confusion. If you lose the trail, backtrack to the last known marker instead of pushing forward.
GPS apps like AllTrails or Gaia GPS work great for tracking your progress. Download maps before you go since cell service is spotty throughout most of the trail. Bring a portable charger to keep your phone powered.
Set waypoints at key junctions like Potato Hollow and the West Rim Overlook. Remember that GPS drains battery fast, so don’t rely on it as your only direction tool.
Trailhead Options for the West Rim Trail
Choose your starting point based on your fitness level and plans.
Starting from Lava Point Trailhead

Lava Point sits at the top, offering a downhill route into the canyon. This option is easier on the knees but requires shuttle arrangements at the bottom.
You’ll need a private vehicle or arrange a drop-off since no shuttle serves this area. The road to Lava Point closes in winter due to snow.
Starting from The Grotto Trailhead

The Grotto starts in Zion Canyon, meaning you’ll climb upward for most of the hike. This route is tougher but doesn’t need complex logistics.
The park shuttle runs to The Grotto stop regularly during peak season. Most day hikers start here since it’s easier to access.
Hiking the West Rim Trail Zion Route Breakdown
Know what each section brings before you go.
Lava Point to Potato Hollow
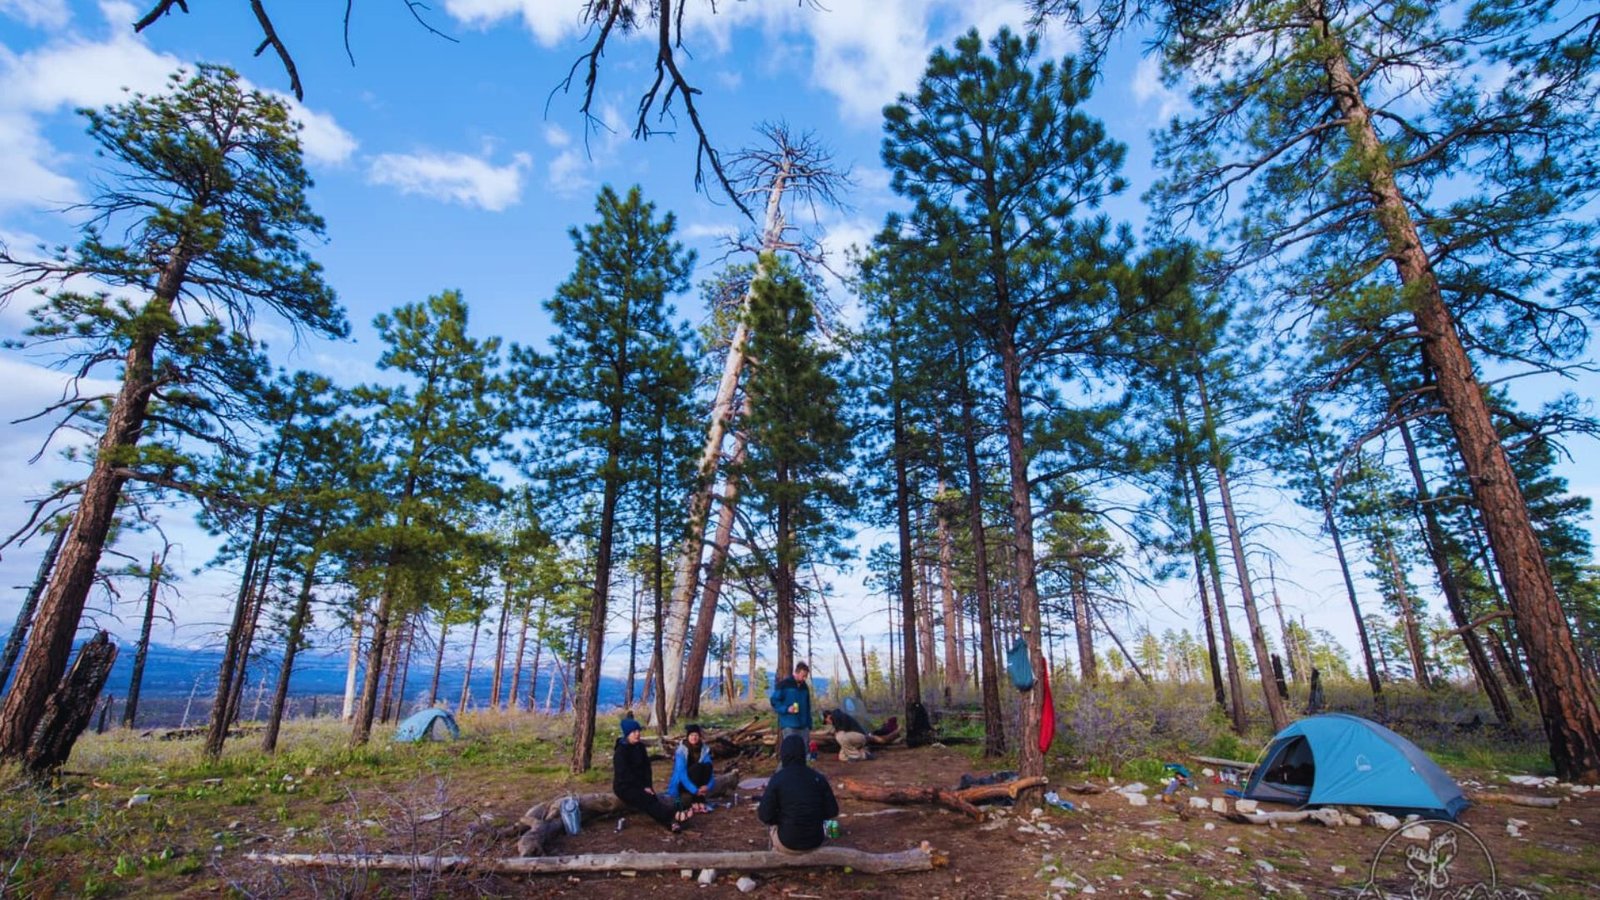
From Lava Point, the trail starts through forest before opening up at Potato Hollow around mile 4. This meadow offers your first big views and makes a great camping spot. The terrain here is relatively flat with ponderosa pines.
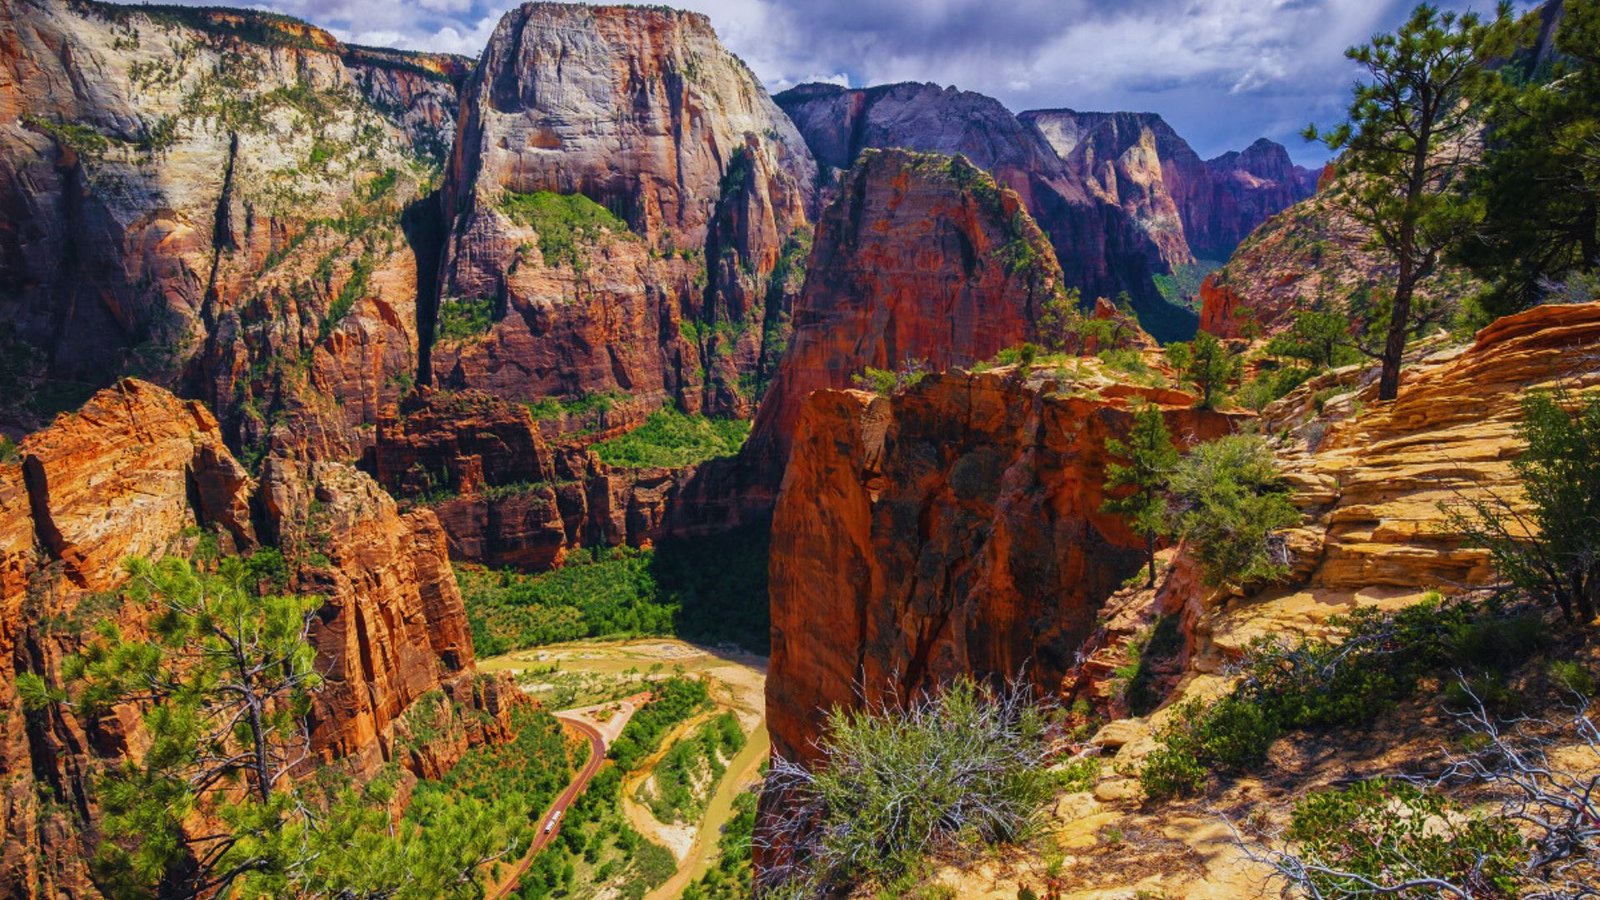
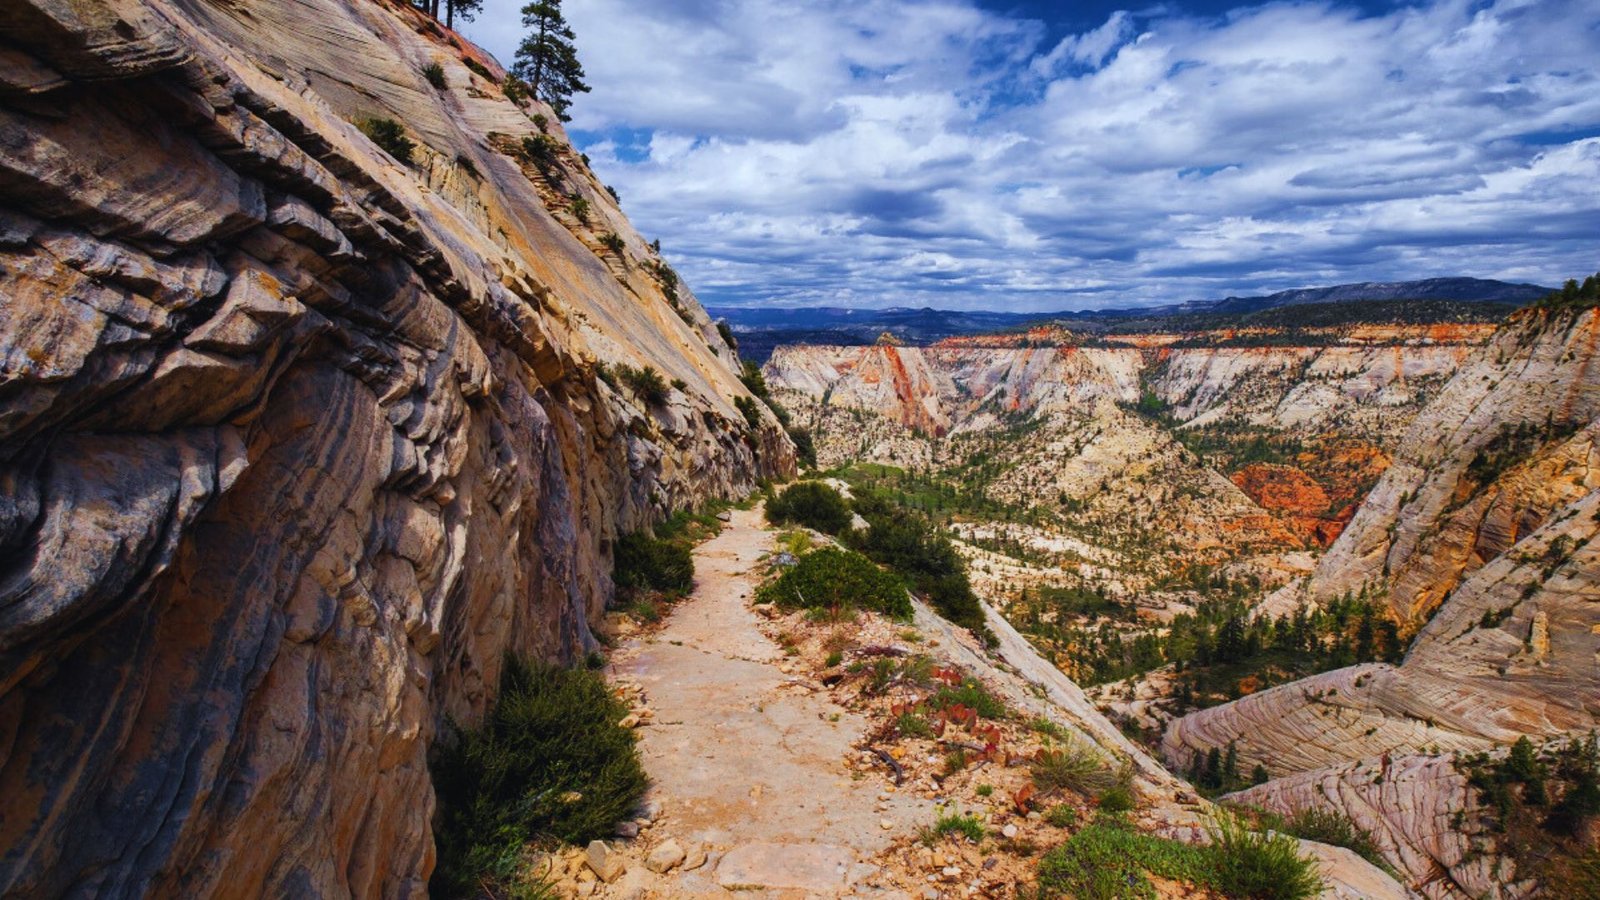
West Rim Overlook and Canyon Views
By mile 7, you’ll reach the West Rim Overlook with massive views into Zion Canyon. You can see the canyon floor thousands of feet below. This is the highlight of the trail, so take your time here.
Descent Toward Zion Canyon
The descent begins after the overlook, dropping through switchbacks and rocky terrain. This section is tough on the knees. You’ll pass Cabin Spring, your best water source along the route.
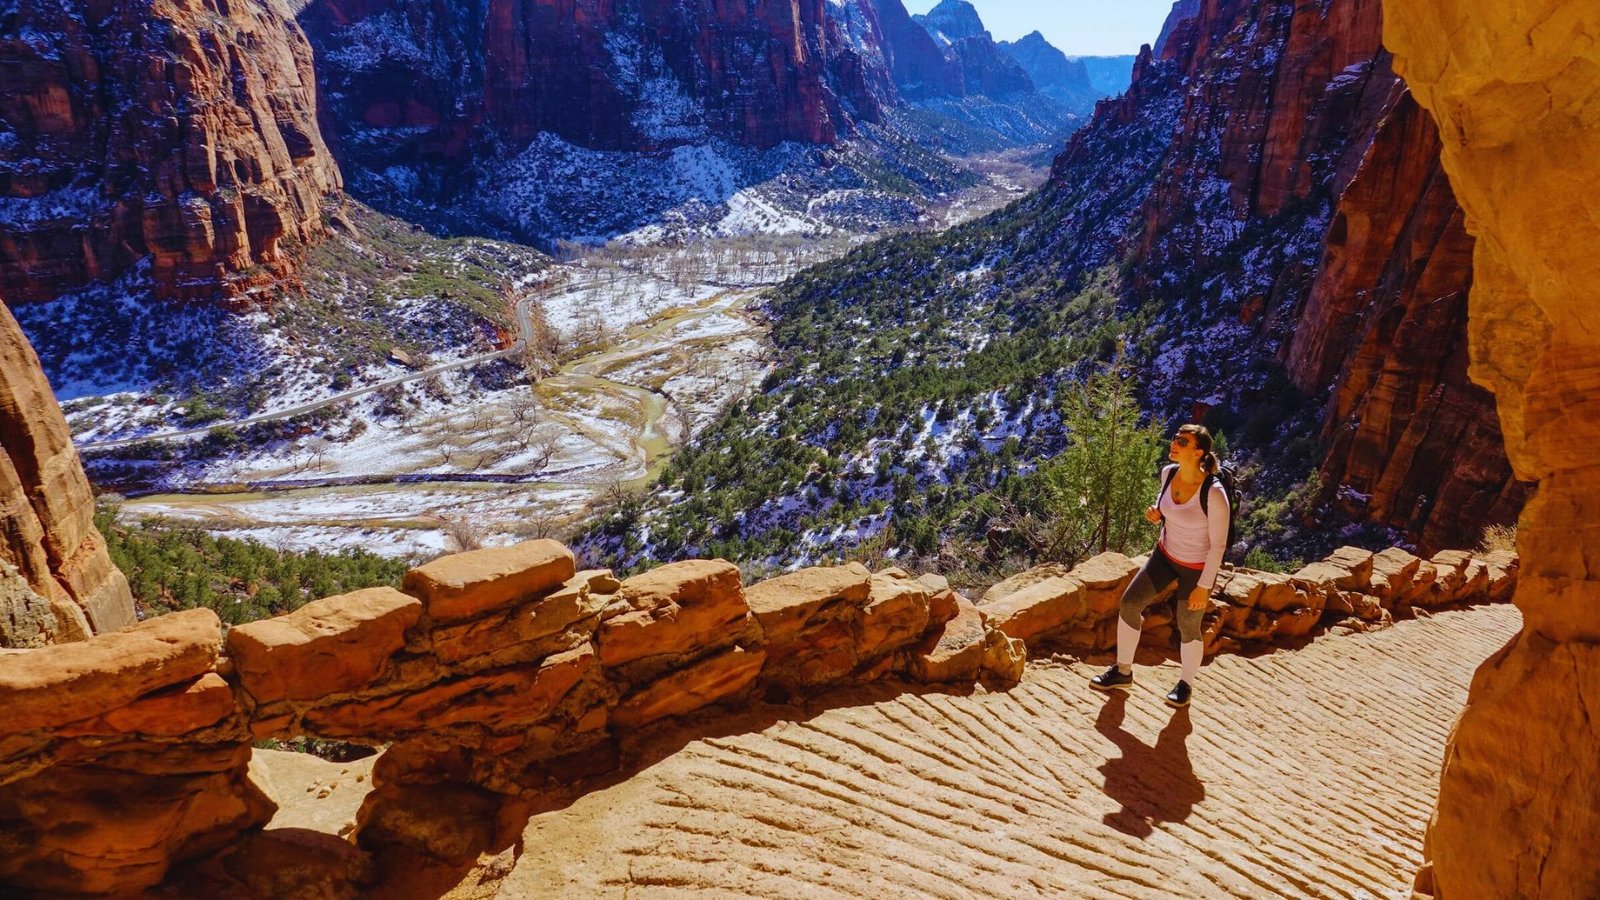
Reaching Scout Lookout
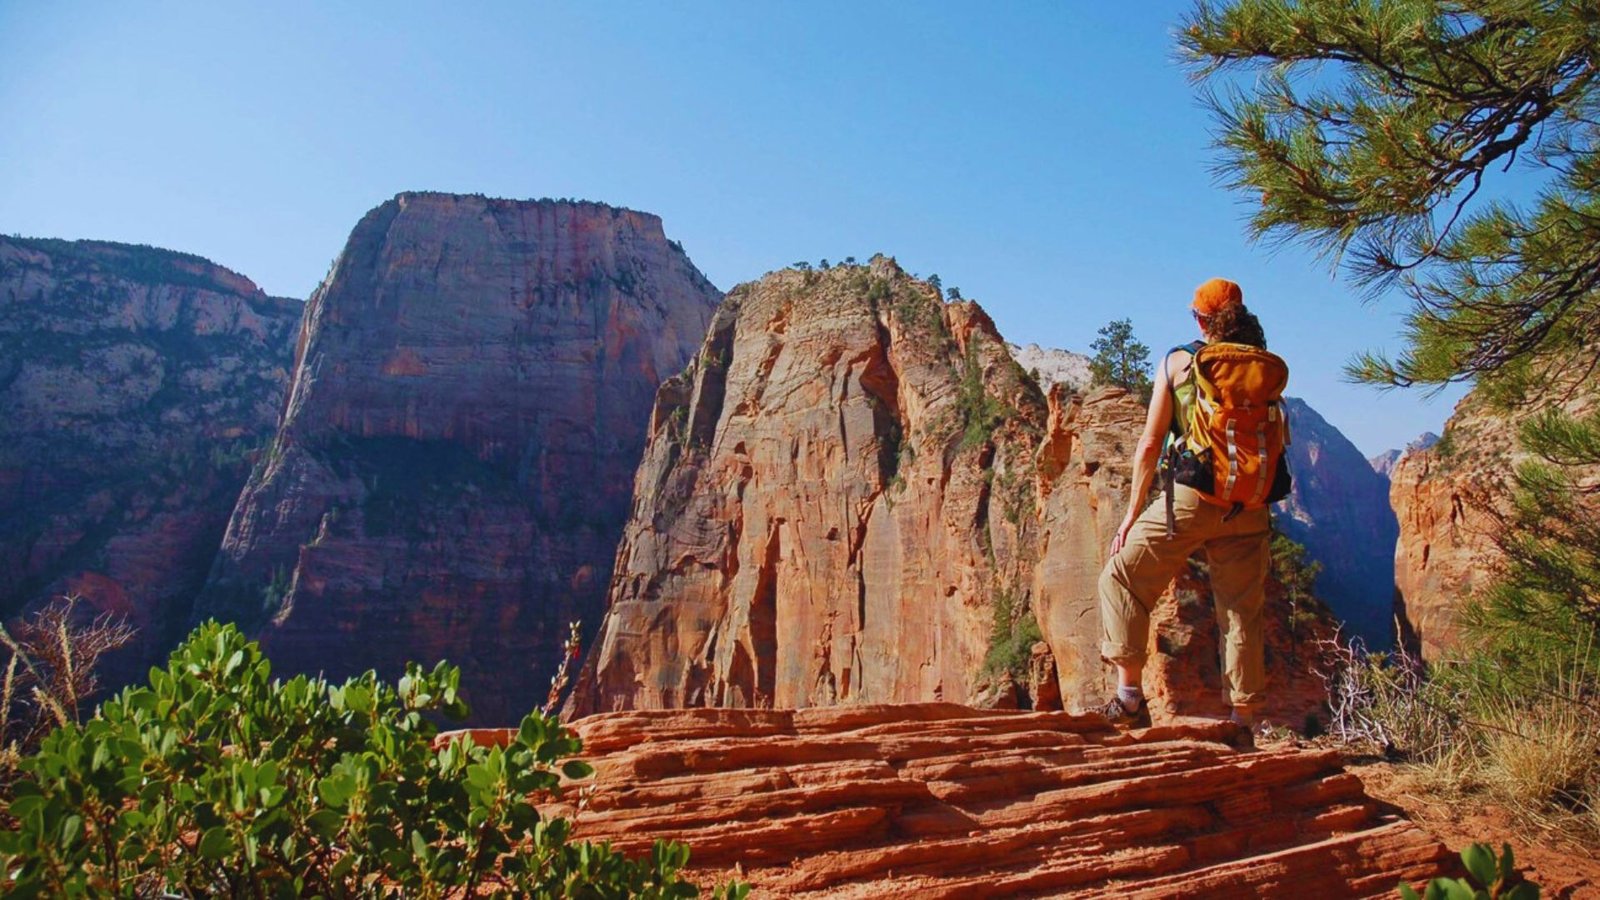
Scout Lookout sits about 2 miles from The Grotto and offers panoramic canyon views. Many day hikers turn around here. The Angel’s Landing chain section starts from this point, while the West Rim Trail continues upward toward higher elevations.
Connecting West Rim Trail to Angel’s Landing
The West Rim Trail and Angel’s Landing share a connection at Scout Lookout.
Angel’s Landing Spur Trail Overview
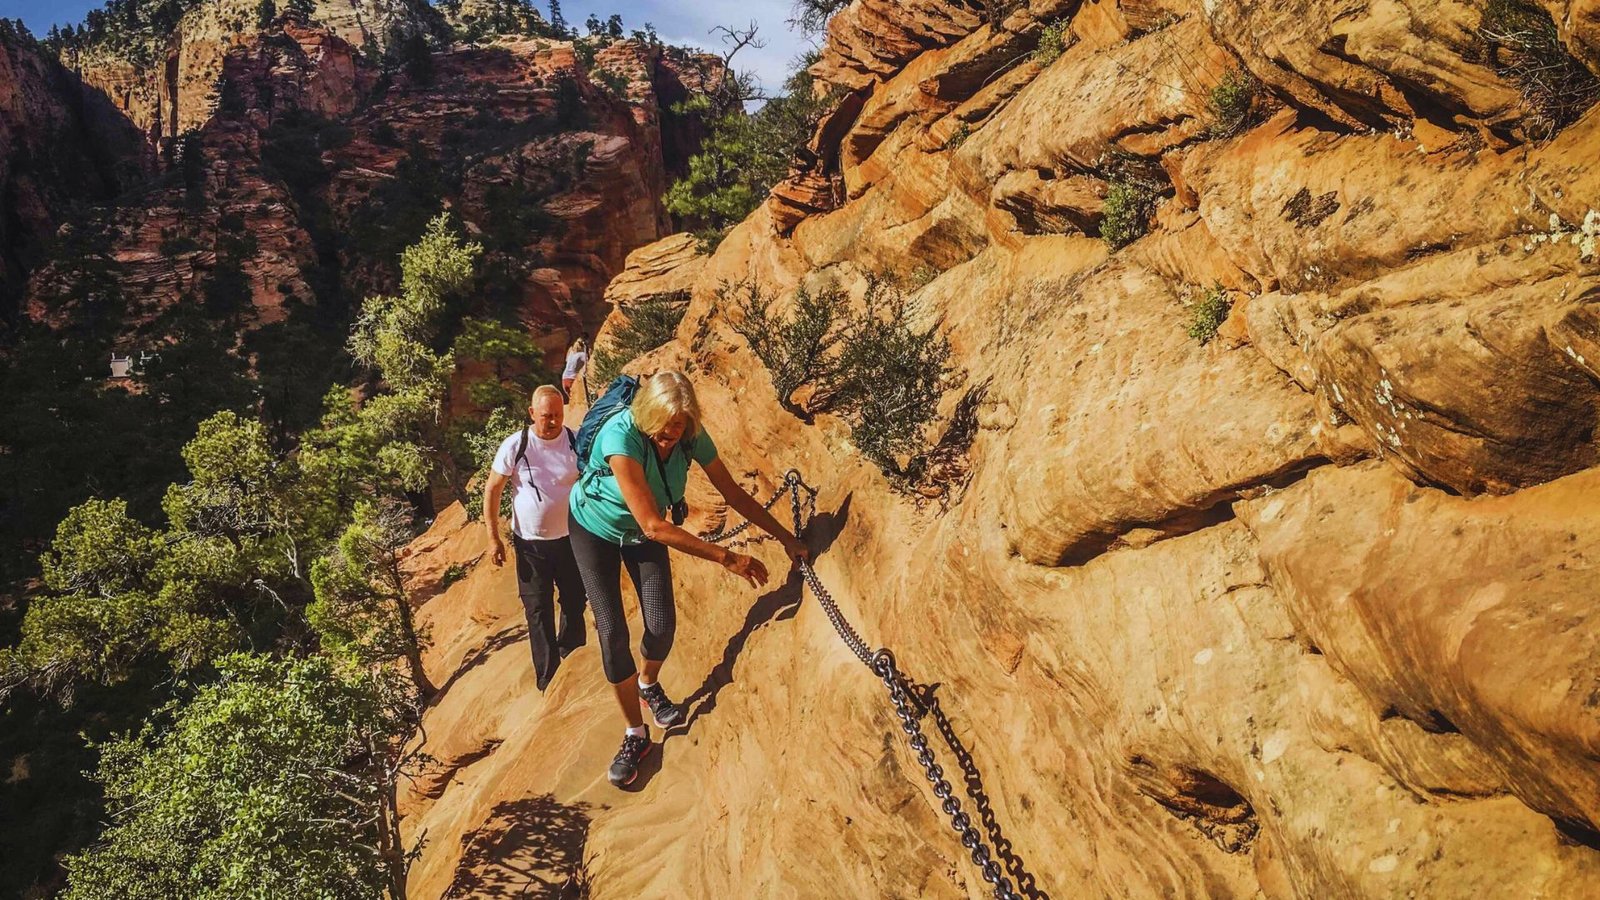
Scout Lookout is where the West Rim Trail meets the Angel’s Landing chain section. From this junction, you can take the 0.5-mile spur trail up to Angel’s Landing summit. The spur involves steep drop-offs and chains bolted into the rock.
It’s a different experience from the West Rim Trail itself. Many hikers combine both trails for a full day of varied terrain. The Angel’s Landing portion takes about an hour round trip from Scout Lookout if conditions are good.
Permit Requirements for Angel’s Landing
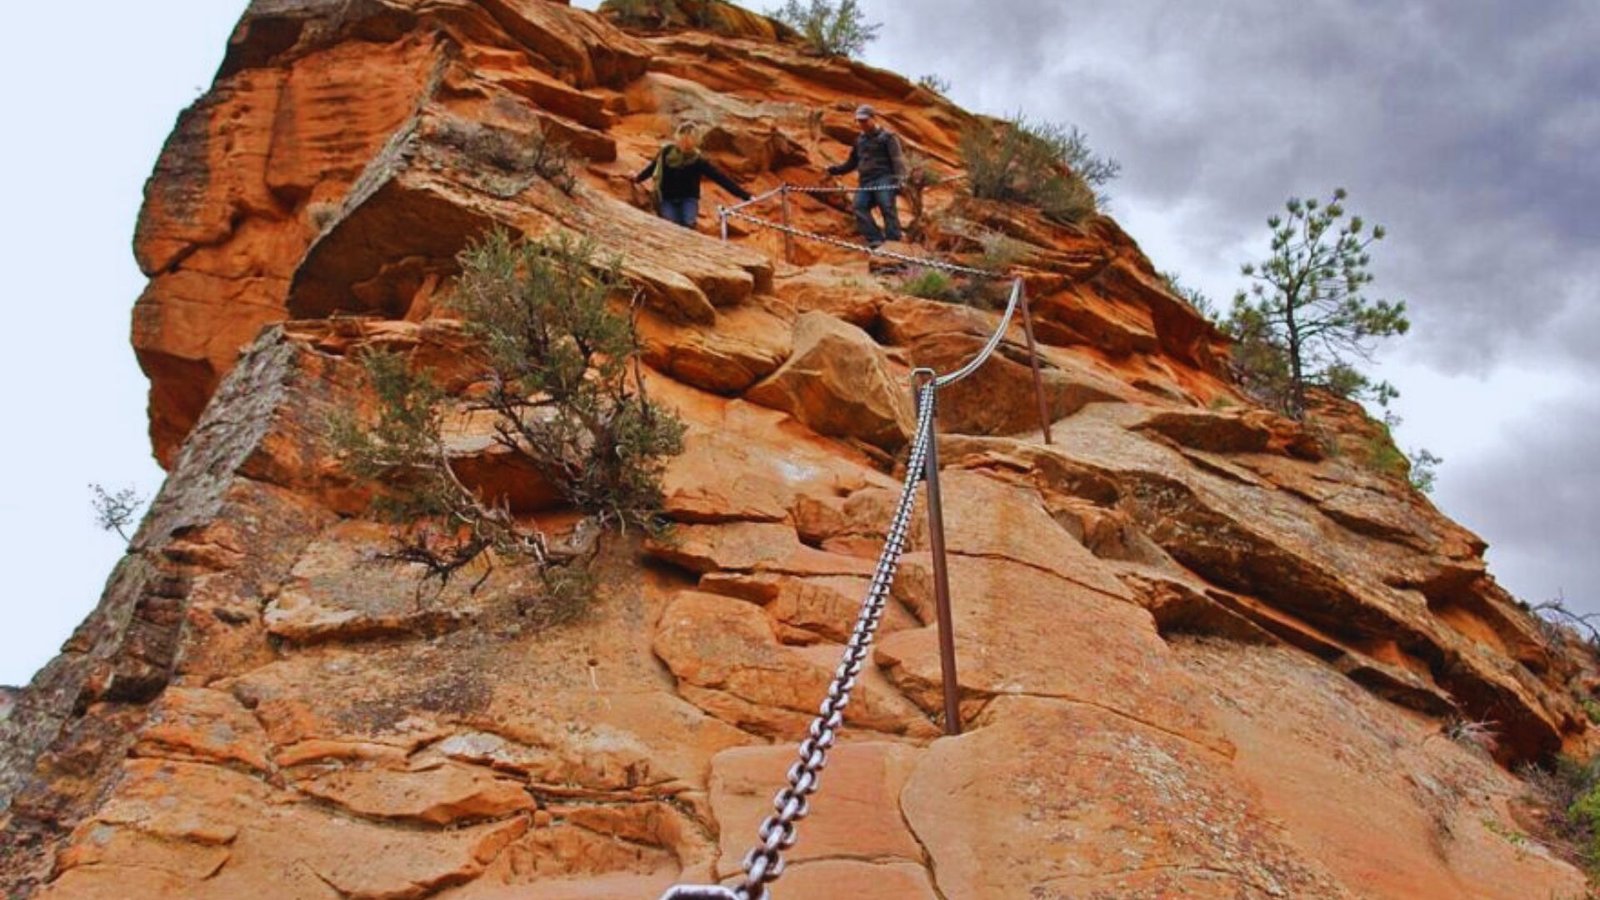
Angel’s Landing requires a separate permit from April through October. You enter a lottery system for seasonal permits or try for next-day permits. This permit is only for the chain section beyond Scout Lookout.
Your West Rim Trail plans don’t automatically include Angel’s Landing access. Check the park website for current lottery dates and costs. Without this permit, you must turn around at Scout Lookout during permit season.
Hiking Without a Permit (Scout Lookout Option)

You can hike to Scout Lookout anytime without an Angel’s Landing permit. This viewpoint offers great views of Zion Canyon from a safe, flat platform. Many people skip the chains and enjoy Scout Lookout as their endpoint.
I’ve done this plenty of times when I didn’t get a permit. The views are still impressive, and you avoid the crowds on the chain section. It’s a solid option if permits aren’t available or you prefer less exposure.
Best Time to Hike West Rim Trail Zion

Timing matters for safety and comfort.
Seasonal Conditions and Weather
Spring (April-May) and fall (September-October) offer ideal conditions with mild temperatures and clear trails. Summer gets hot, especially on the canyon floor sections, so start early.
Winter brings snow to higher elevations, particularly around Lava Point. The road to Lava Point typically closes from November through May due to snow.
Avoiding Crowds on the Trail
Weekdays see fewer hikers than weekends. Early morning starts help you avoid afternoon thunderstorms during monsoon season (July-August).
The trail is less crowded than popular canyon routes year-round, giving you more solitude and space.
Camping on the West Rim Trail
Overnight trips let you experience the trail without rushing.
Designated Campsites Overview
Popular campsites include Potato Hollow, Site 9 near the rim, and spots along Telephone Canyon. Most hikers camp at Potato Hollow for easy access and good views.
Each site has a limit on group size and requires proper food storage. Water sources are limited, so plan carefully and carry what you need.
Permit Requirements for Overnight Hiking
Zion requires permits for backcountry camping, which you can reserve online or get at the visitor center.
Book permits early since sites fill up fast during peak season. Permits are limited to protect the backcountry, so don’t wait until the last minute.
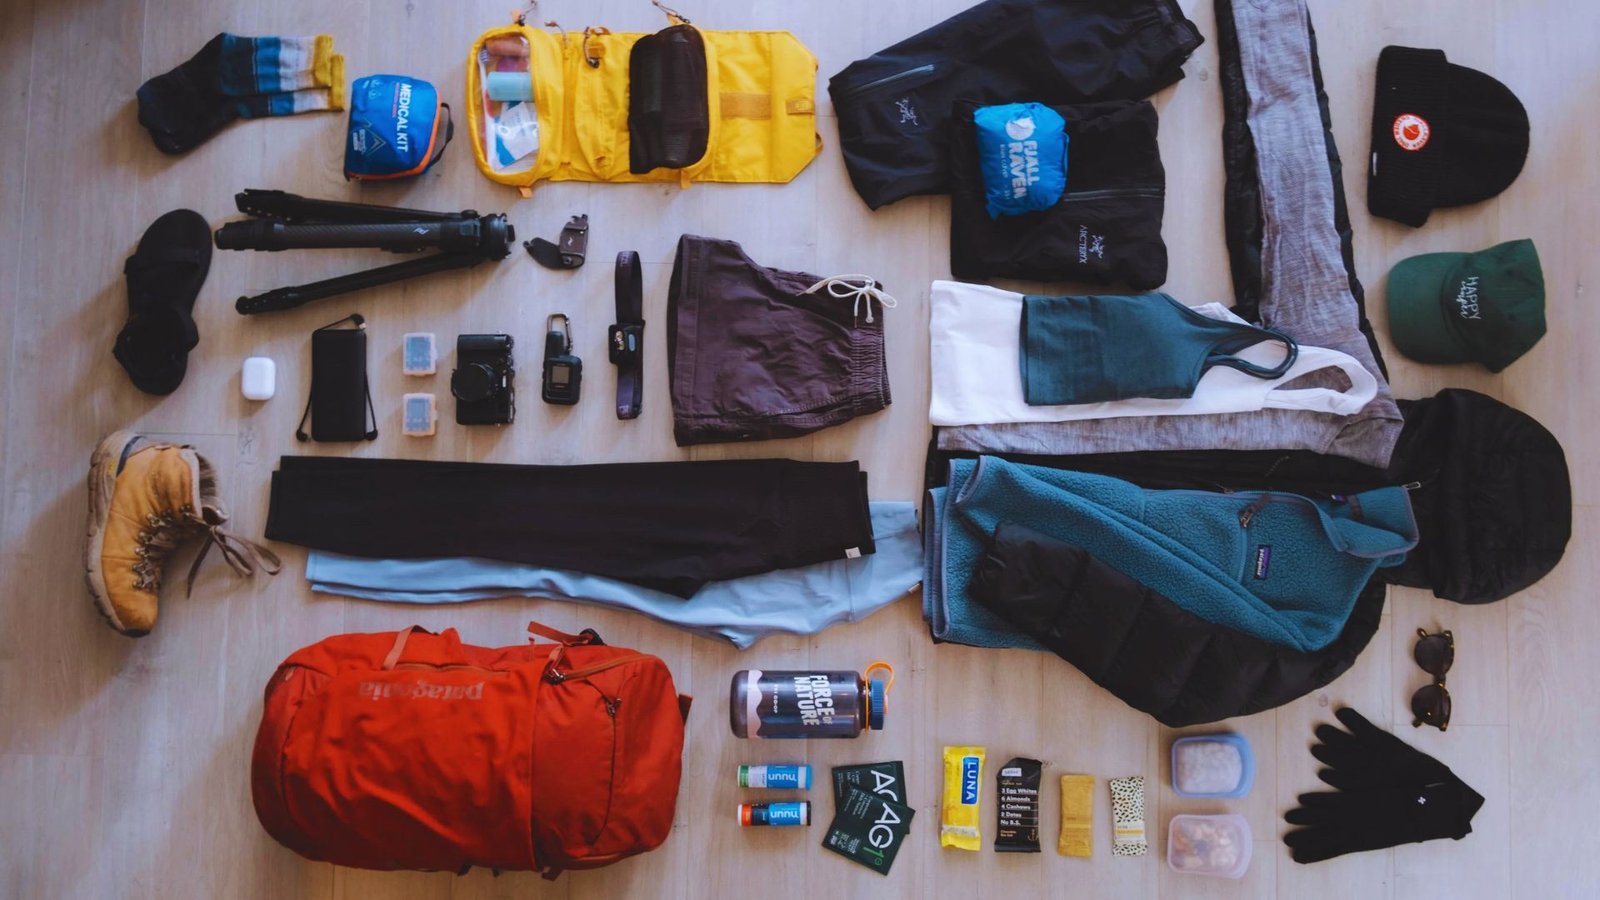
Safety Tips and What to Know Before You Go
- Start early to avoid heat and afternoon storms
- Carry 3-4 liters of water per person since sources are scarce
- Wear sturdy boots with good ankle support for rocky descents
- Bring trekking poles to reduce knee strain on steep sections
- Check weather forecasts and trail conditions before heading out
- Pack layers since temperatures vary with elevation changes
- Tell someone your hiking plan and expected return time
Conclusion
The West Rim Trail Zion National Park changed how I see hiking. Every time I reach that rim overlook, I remember why I keep coming back. You’ve got all the info now i.e. permits, water planning, route details.
My advice? Just book that permit and go. Start training those legs, pack your gear, and get ready for views that photos can’t capture.
Drop a comment below if you have questions, or share your own West Rim stories. And if this guide helped, pass it along to your hiking buddies.
See you on the trail.
Frequently Asked Questions
How long does it take to hike the West Rim Trail?
Plan for 6-8 hours to complete the 14-mile one-way trail. Most people split it into two days with an overnight camp.
Can I hike the West Rim Trail in winter?
Lower sections are accessible, but Lava Point Road closes November through May due to snow. Start from The Grotto instead.
Do I need a permit for the West Rim Trail?
Day hikes don’t need permits. Overnight camping requires a backcountry permit from the park.
Is West Rim Trail harder than Angels Landing?
It’s longer and more remote but less technical. The challenge is distance and elevation, not exposure or chains.
Where can I find water on the West Rim Trail?
Water is scarce. Cabin Spring is most reliable, but carry your own or bring a filter for natural sources.